

Breaking it down
There are many parts to weaving.
- Pick or create the pattern
- Pick the fiber
- Pick the colors
- Calculate warp and weft
- Wind the warp
- Dress the loom
- attach, wind, thread heddles, thread reed, tie on, tension, tie up
- Wind the bobbins
- Weave the pattern
- hemstitch beginning and end
- Take off the finished weaving
- secure ends, twist fringe
- Finish the fabric
- wash, press, sew hems
Someone always asks, “how long did this take you?” I’ve had to start answering, “which part?” Most of the time, they just want to know how long it takes after it’s on the loom until it’s off. I’ve just started keeping a log so that I can answer these questions without guessing.
Sometimes we just don’t wanna!
Most weavers have parts of the process they love and parts they slog through. I have found that the parts I liked least in the beginning, became more enjoyable over time as I found easier ways to approach them. I can honestly say that right now, there is no part of the process that I don’t get something out of more deeply than the task itself.
The last of the tasks that became enjoyable to me was the sampling. Sampling to weavers is like swatching to other fiber arts. It’s the part that shows you what the finished product will look like off the loom and after the finishing process.
At first, I used standard calculations with standard fibers and didn’t sample. I didn’t have requirements for the size of the finished products. I didn’t have expectations or the density of the fabric, or drape, or any of the other adjectives used to describe the wraps I was making.
Sometimes we do!
Now that the honeymoon period of weaving is over, I’m very interested in learning how the fibers I have can be made into the type of fabric I desire. My typical process is to set aside the first foot or so of my warp to make sure the pattern is set up correctly and that I like the color combination then I’d move on to the main piece.
With this blanket shawl, I wove several inches that included all the color changes in the main piece. Then I cut it off the loom. This means that I have to take the time to retie it on and re-tension it, and accept that there is more loom waste. Loom waste is the fiber that is needed to tie the warp onto the loom, front and back, that can’t actually be woven. We call it waste, but it’s unavoidable. Weavers have tricks to minimize this, but it’s something that a knitter or crocheter isn’t used to dealing with, since there is relatively little yarn waste on a project.
I was so glad I had pushed myself into this step. I learned so much about using wool and wool blends in weaving. It’s the first wool I’ve woven with, so I had no idea how much shrinkage would happen. I knew it would be more than rayon, tencel, and cotton. I had to start somewhere, so I chose a sett that was recommended for the thickness of the wool I used. A sett is how many strands of fiber per inch you’re putting on the loom.
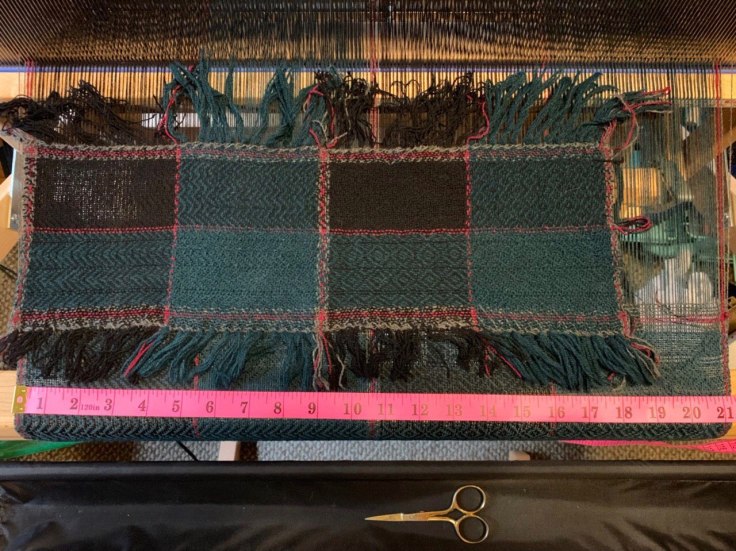
In the photo above, I’ve taken the finished sample, which I’ve washed to the final density. The tape measure is laid across the warp that is on the loom, and shows the original warp is 21″ wide. The fabric, after being washed and dried is only 18″! This is 15% shrinkage. I now have this noted for future projects. My sampling showed me that I didn’t need to make any modifications. I like the softness and density.

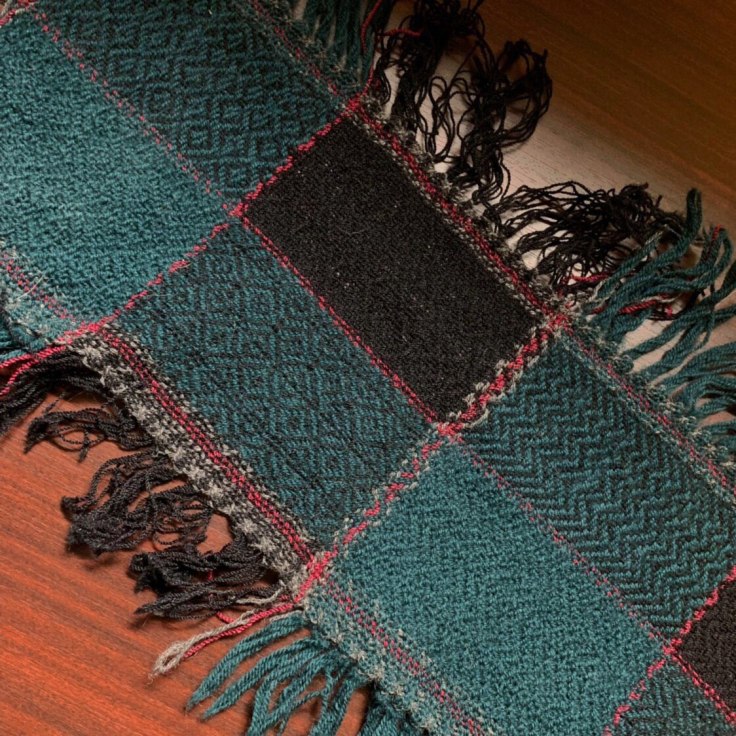
Another thing I can see with the sample is how I want the finished edge to look. I did a different quantity of grey on either end, and using the sample, I can choose which looks better. It’s not right or wrong, just how I want it to look.

I also got a glimpse of how the fringe will look. This will help me decide how many strands I want to knot together, how long I want the fringe, and if I want it twisted together. Fine wool blooms beautifully.
And in the end…
I’m glad I have changed my outlook on samples from wasted time, effort and fiber to useful learning tools. I still may not do ‘off the loom, full finishing’ samples all the time. But I will definitely do them with new fibers and when mixing fibers to see how they look after shrinking up. They also make a nice record of things I’ve made that have found their way into the world.

Leave a comment