
A week ago (Feb 11, 2026) I got an email from Spin Off Magazine telling about their new class. The class was “5 Ways to Prep and Spin a Braid.” I may have been completely uncool with my very loud whooping reaction when I saw it. It was exactly what I’ve been trying to figure out! They just handed me a methodology to use to compare techniques and see (and touch and marvel over) 5 different ways to prep a handpainted fiber braid.
Now, I admit, I tend to watch a class and rarely ever do all the steps they talk about. But this was different. I asked several spinning groups the question of how to visualize what a braid ‘could” look like and got the standard condescending answer of “you’ll just have to try it and see” (which is a cop out that they don’t have any idea but needed to be heard anyway), Yes, I was bitter. But not any more! Now -I- can help answer this question for others.
Fiber, especially beautiful hand painted fiber, is expensive. And it’s typically a very unique item where experimenting means losing the fiber to do samples. Two hand painted rovings dyed at the same time will never be truly identical. It’s the nature of this art. Even the samples won’t be easy to replicate. However, I did learn some valuable information about striping and how colors react when blended in different ways.
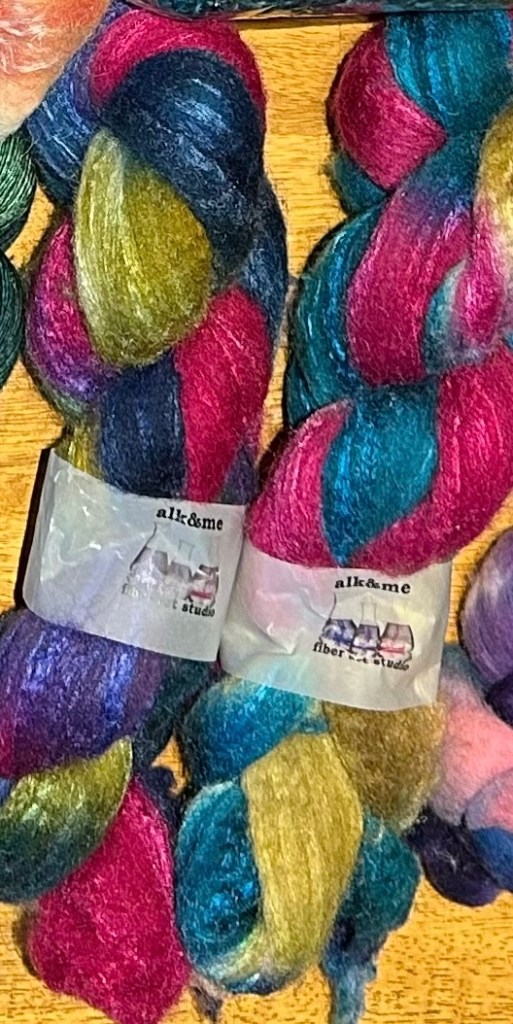
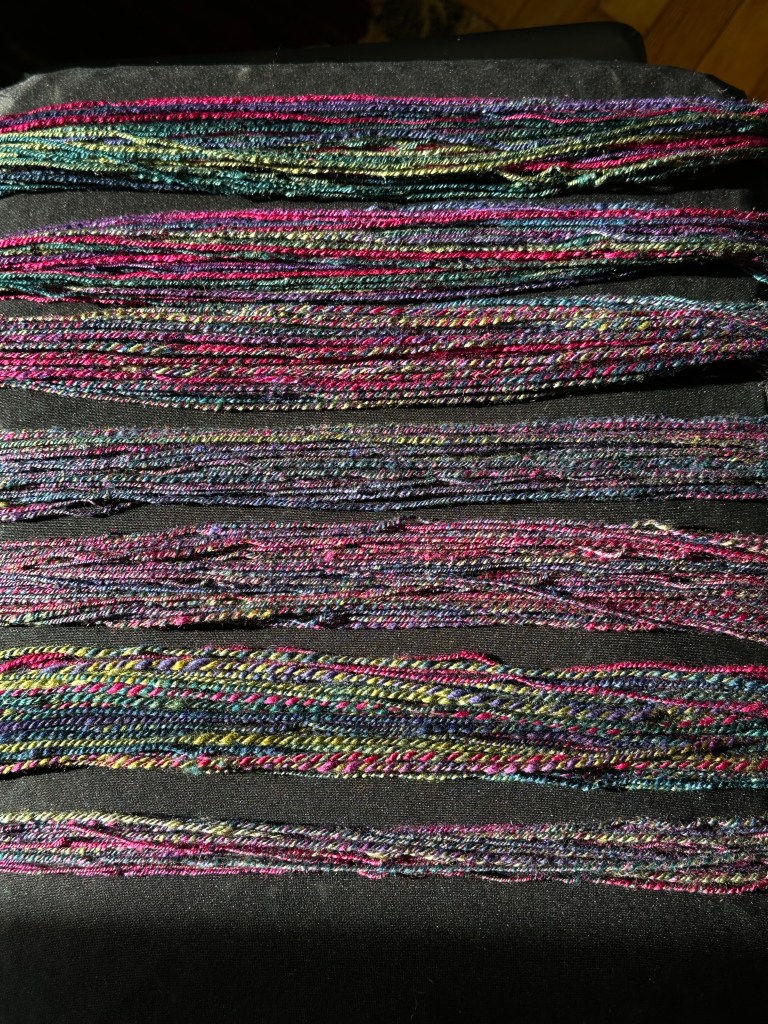
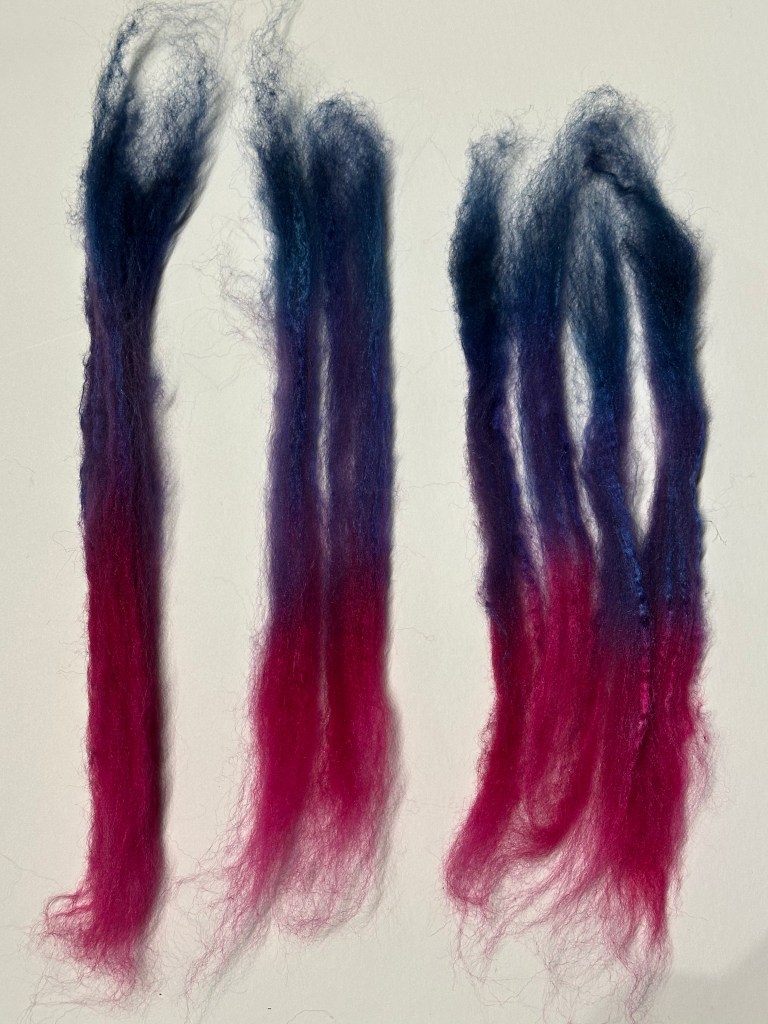
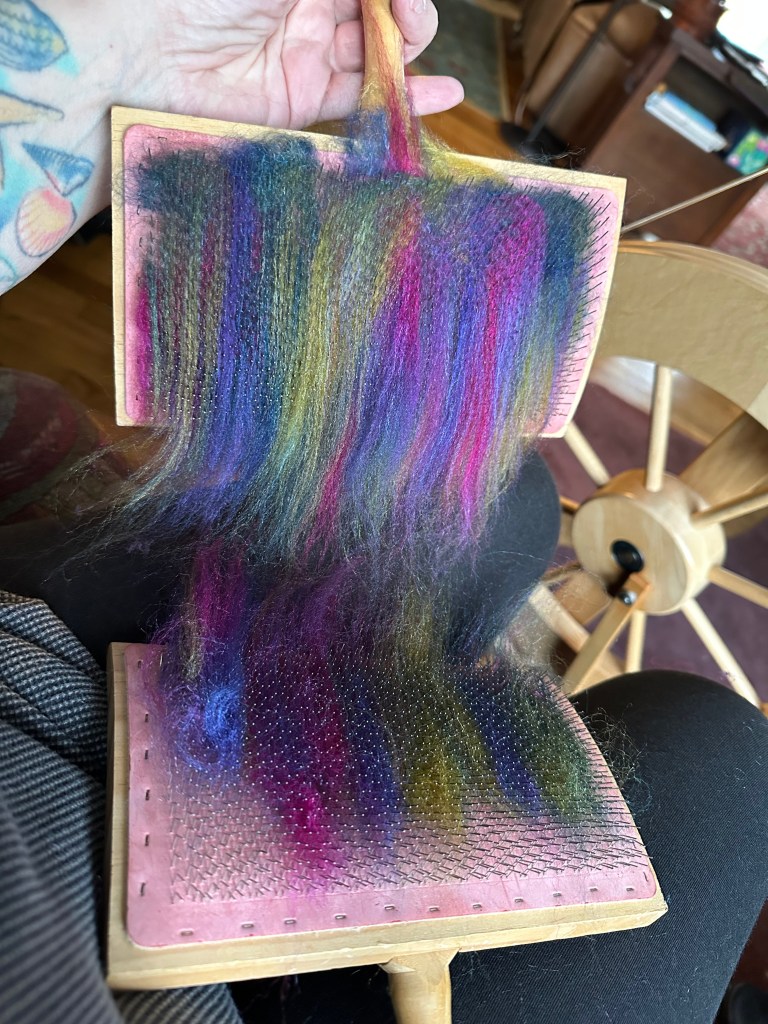
For the sake of wanting to take this class, I went and picked out a braid from the stash I got from the Michigan Fiber Festival August 2025. The artist is Alk&Me. The content is Blue Face Leicester and Tussah silk. I used the one on the left. These two braids have all the same colors, but one on the right is more turquoise forward and the one on the left has more of the richer greens and purples.
I watched the class twice and then for a third time where I spun along. I was absolutely fascinated. It took two days of spinning, one day of plying then wet finishing, two days of knitting, and one to block the samples. It could have been a few days less if I wasn’t taking so much time to marvel over the color blending.
The class was set up to do 5 samples to compare. I had an idea for a 6th. Which meant I did 7. It’s spinning math, don’t question it.
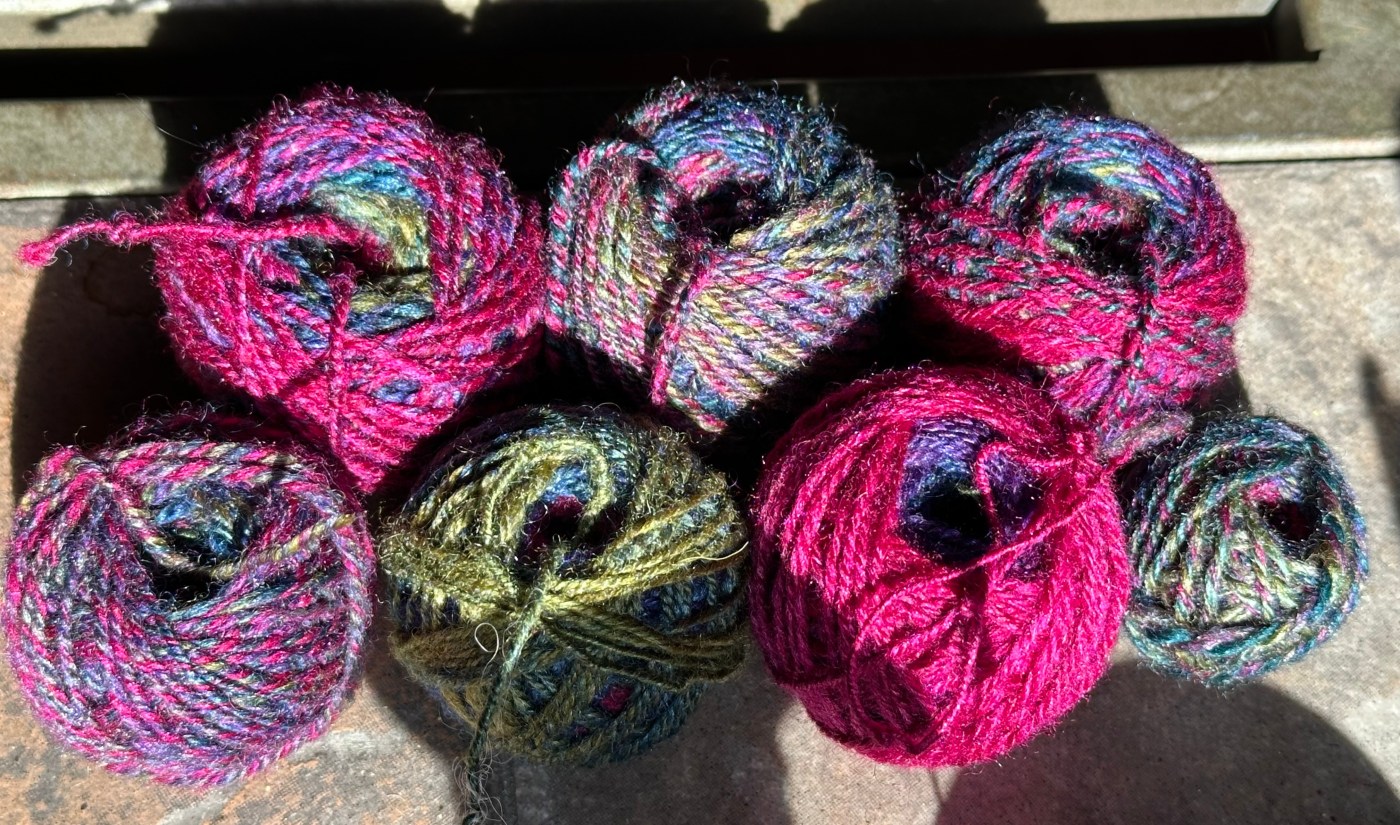
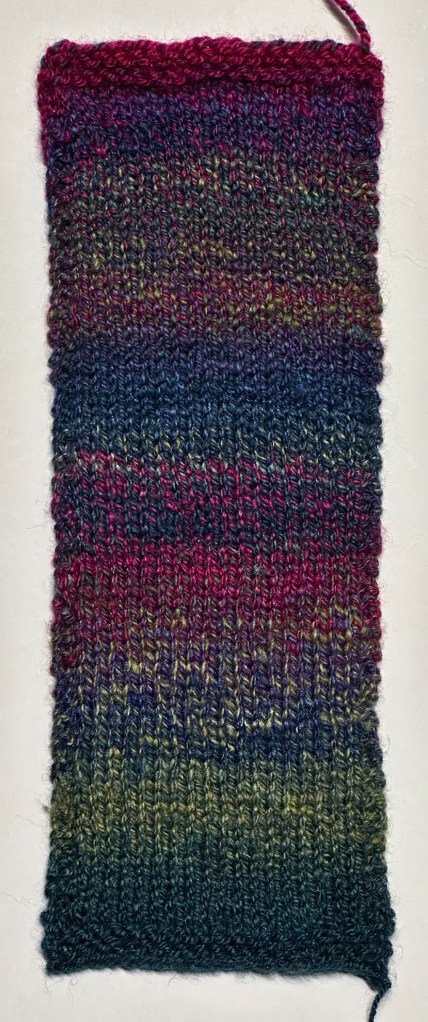
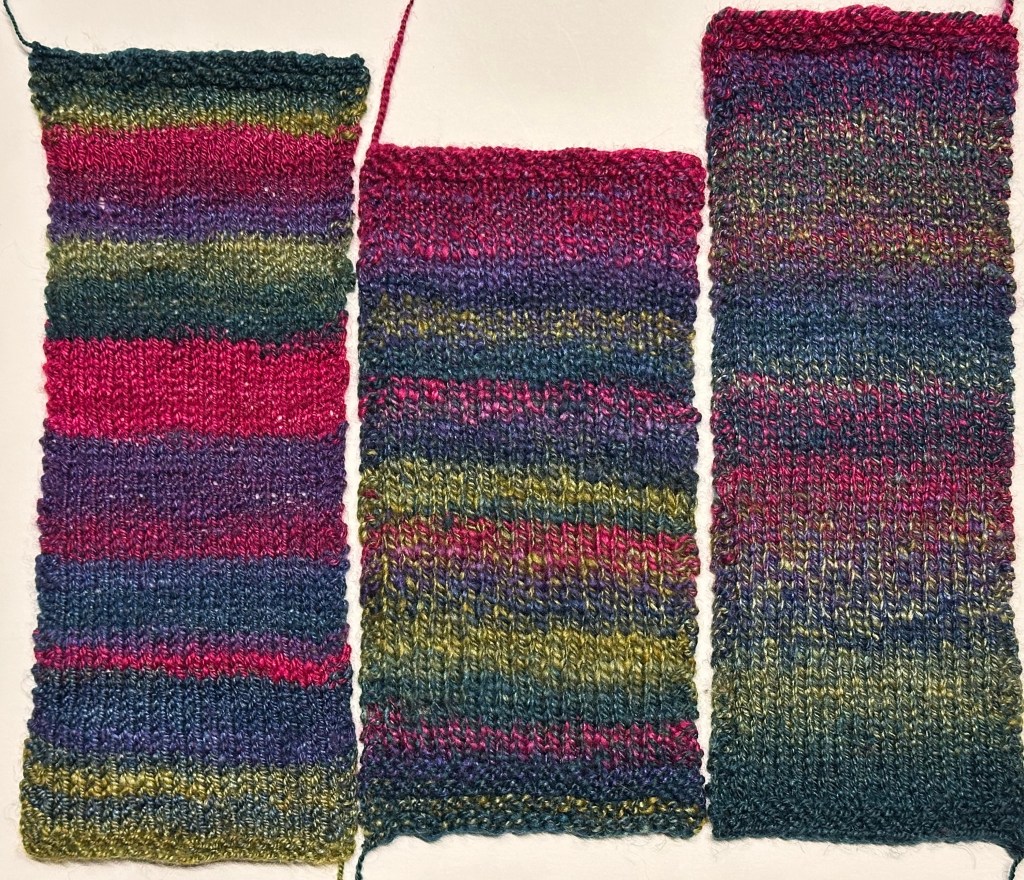
Here’s the set I completed as per class instruction.
Remember, these all came from the braid on the left in the photo above.
Let’s look at how these were done.
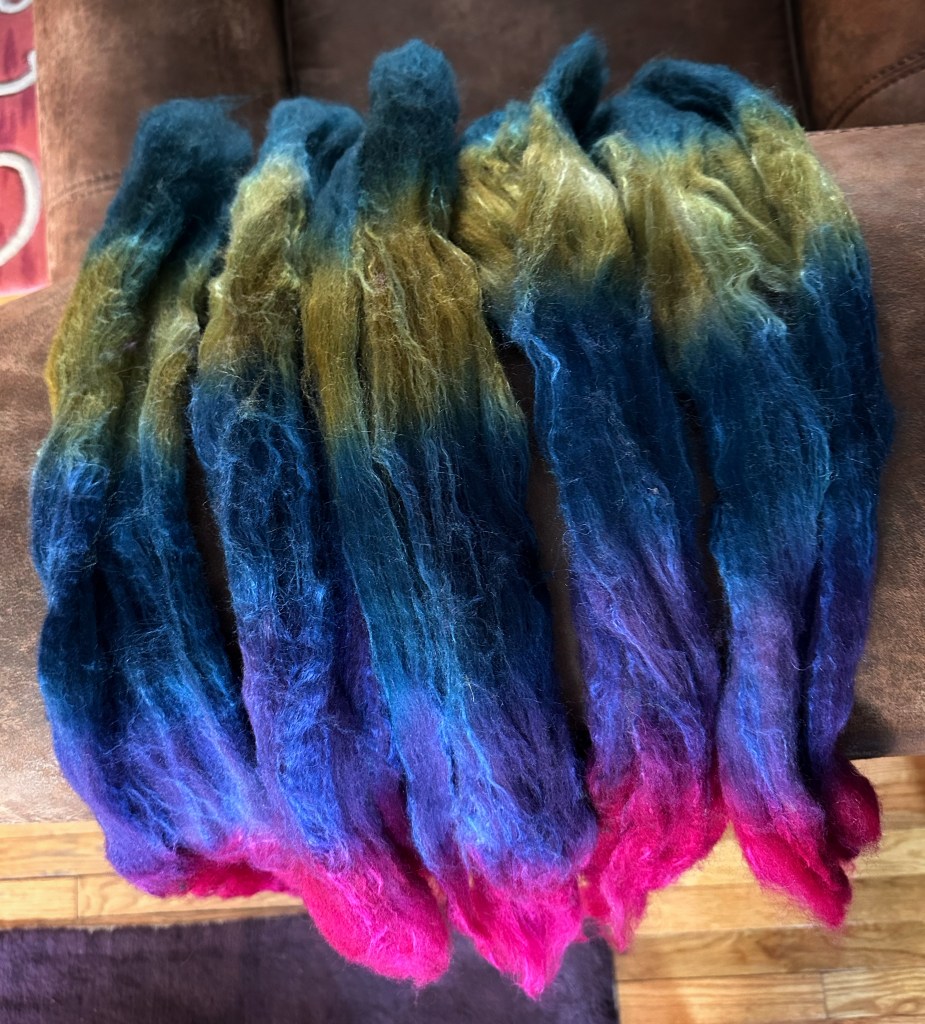
First thing was to take the fiber braid and find a pattern for how it was dyed. Then to break apart the braid so that each piece contained all the colors. These segments didn’t weight the same, which is why the samples are different heights.
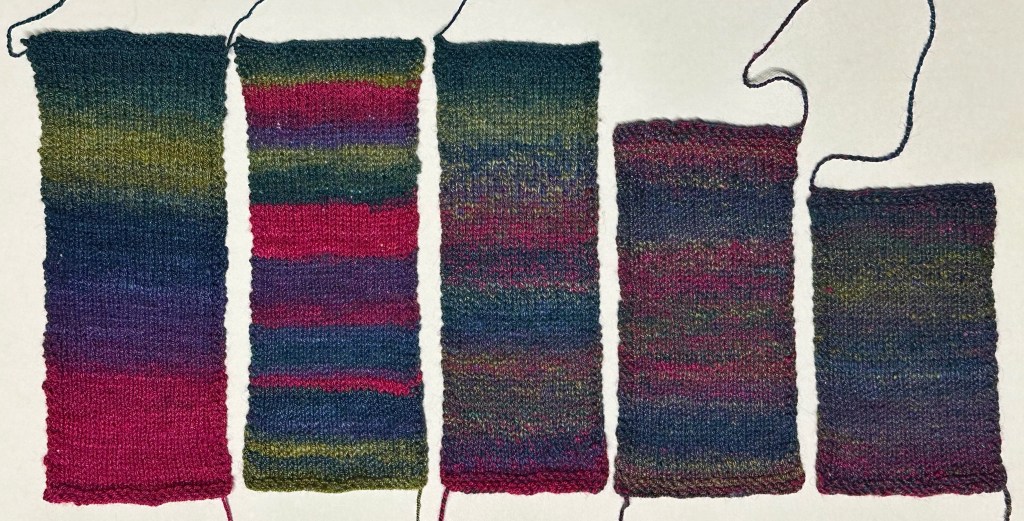
This spinning so cool to do and then to see how the colors morphed. Each of the 7 samples I made were spun in a different manner. You can already see how different the spun yarn colors are from the unspun fiber.
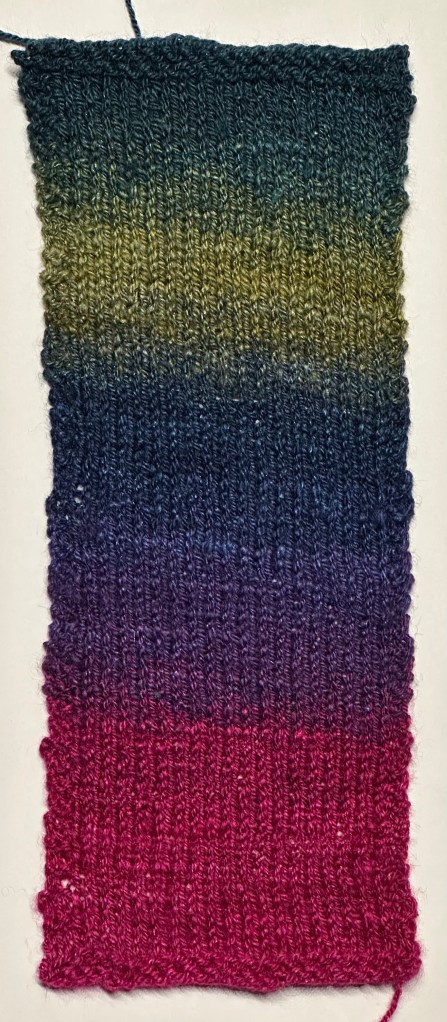
Sample #1:
Spun: End to End
Plied: Chain (3 ply)
For this one, I spun one of those segments of fiber, starting at the pink end and finishing with the teal. This gives the longest stripes. The transition between the colors was a natural blending from the dying process. This gives the widest and most distinct stripes. This was then chain plied to keep the colors bold and distinct.
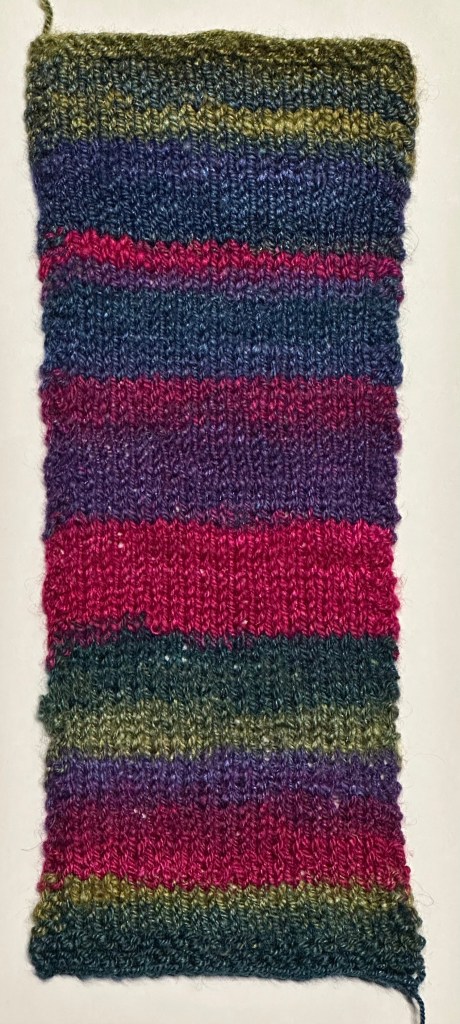
Sample #2
Spun: Shuffled
Plied: Chain (3 ply)
For the second sample, I broke the fiber up into about 10 or so smaller segments where each had at least 2 colors. Then I put them in a bowl and randomly picked one and spun it. Whatever end I picked up is where I would start. Then I chain plied them to keep the color runs long and distinct. I did try to blend the end of one end into the start of the next to minimize harsh color changes.
Sample #3
Spun: 1:2:4 Fractal
Plied: 3 ply
Oh how I love fractals! To spin a fractal you divide the fiber into multiple slivers (lengths) and each subsequent division gets broken into smaller widths. You do this to shorten the color runs and then ply them together so that the colors mix. In the photo, each of these 3 sets of slivers are the same weight. The one on the left weighs exactly what the 4 pieces on the right weigh. The left piece will have longer spun color segments because, well, more fiber!
1:2:4 means that the fiber was divided into 3 three equal sections. One of the 3 is an end to end color spin (pink to purple to blue). The next is further divided into 2 sections, then spun one after the other so half way through it goes from blue back to pink to starts over. The last is divided into 4 sections and spun one after the other, so the color sequence gets repeated 4 times.
These sections are spun onto separate bobbins and then plied together. It mutes the colors and the stripes and has truly complex and lovely color changes.
The actual sample below had more colors than the slivers in this example..
Sample #4
Spun: Marls
Plied: 3 ply
This is the first time I’ve done a true marled yarn. It was a little more fussy, but really worth it! To spin marled yarn, you take 2 colors and hold them together to spin the single. I did this for 3 singles then plied them together. This mixes up the colors really well. Less evident striping, more color pooling occurs. The colors become less vibrant.

Sample #5
Spun: Blended
Plied: 3 ply
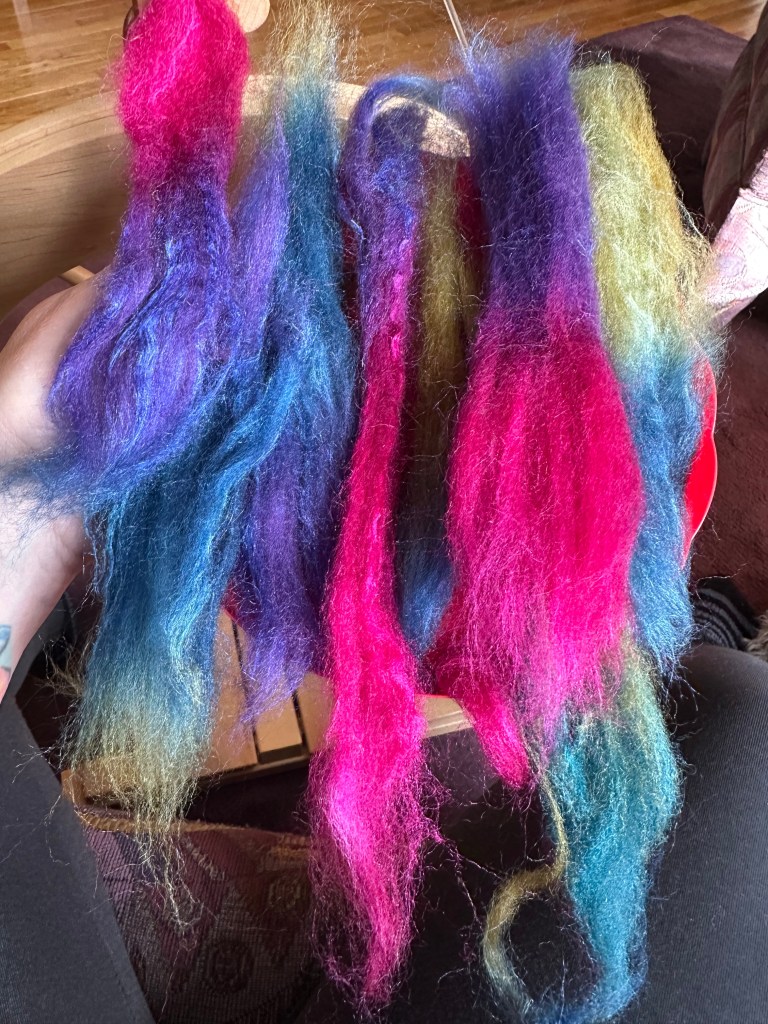
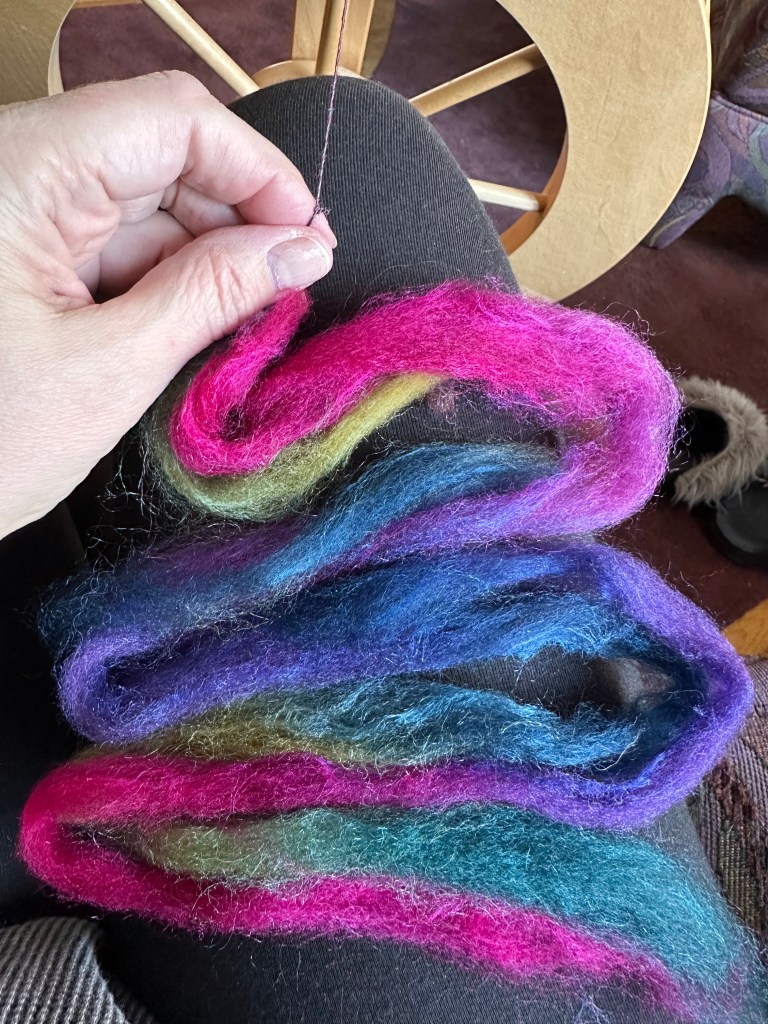
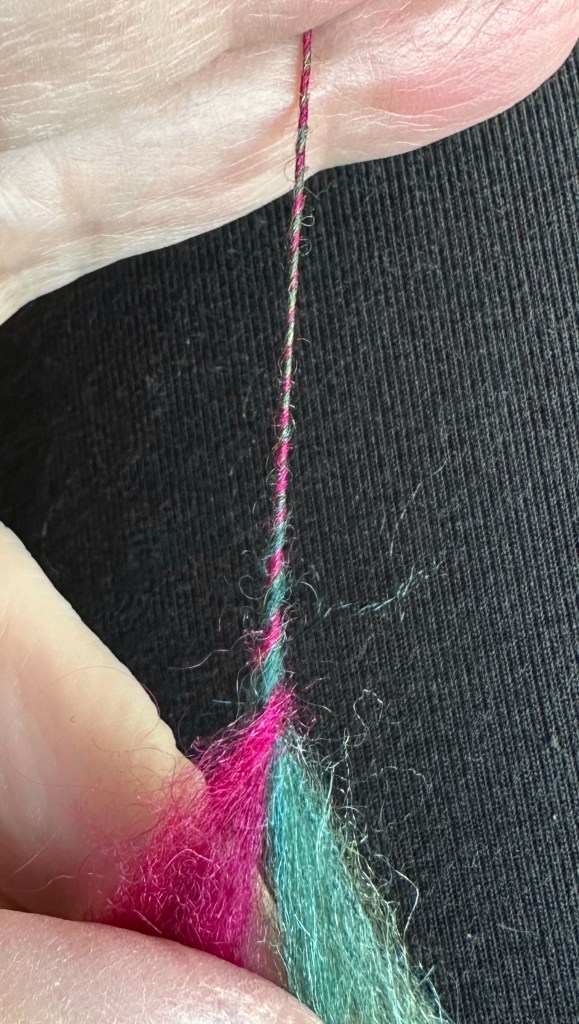
With this final class sample, I used my blending cards and filled one with random colors from the braid, then combed the fibers just 2 passes. I rolled off the now softly blended fiber and spun it so that I had 2 singles blended this way. The third ply was spun end to end like the first sample to help keep the color continuity in the final yarn.
The photo below on the left is the colors on the blending cards. The photo on the right shows 4 softly blended rolls and one of the unblended, which has the color order preserved. In the sample, you can see how it approaches a neutral blend of all the colors. There is no striping, just pooling. The more you blend, the more you lose the distinctness.

Sample #6 (extra. credit)
Spun: 1:4 Fractal
Plied: 2 ply
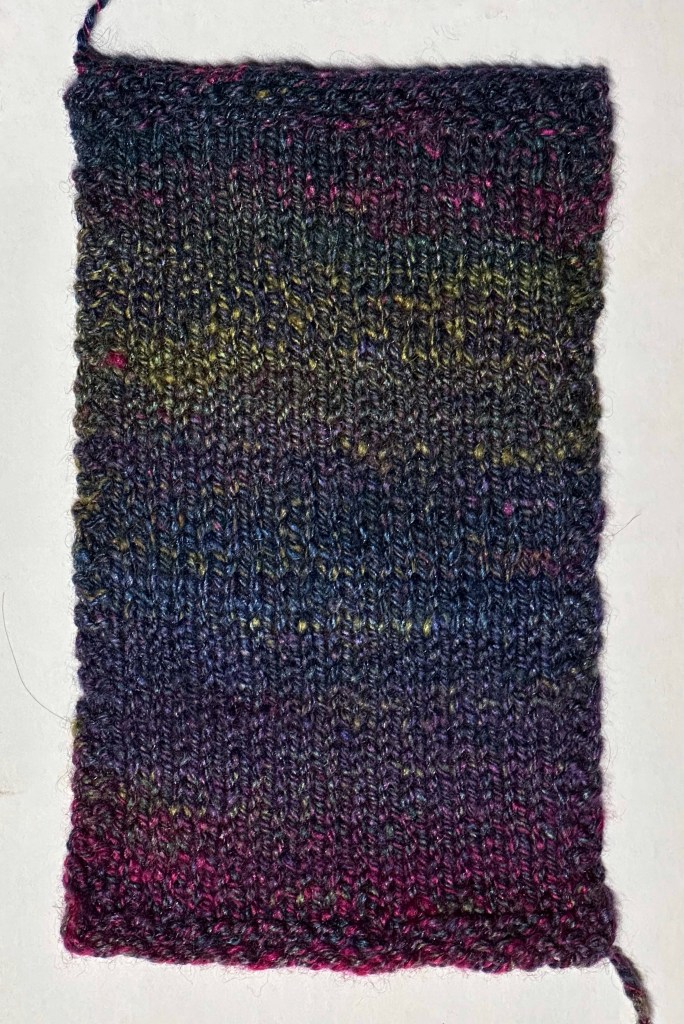
Since I wanted to see another comparison, I decided to do one more big sample. This one changed several things. While it was a fractal, it was only a 1:4 fractal which was then just made into a 2 ply. This is how I tend to spin many of my braids to then use in weaving. I spun this a little thicker so that the finished yarn was about the same diameter of the 3 ply. I like how it really fits in between the 2nd (Shuffled) and 3rd (1:2:4 Fractal) samples. The transition between the stripes is less defined than #2 but the stripes are more evident than #3.
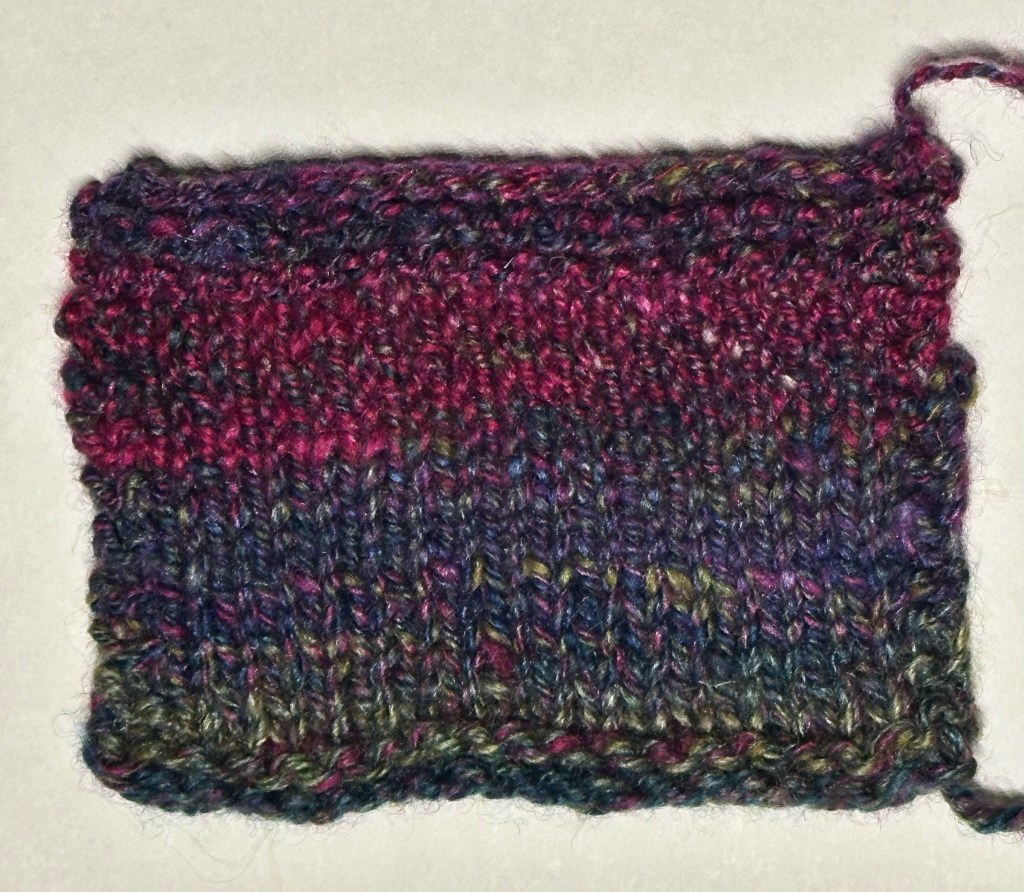
And the last sample was just for fun. When you spin, there always seems to be more fiber left on one spindle than the other. So I took the leftover singles left rom all the methods and plied them together in a 3 ply. I think that saving the extra bits might be a way to create some fun yarn.
I learned so much from this class. I understand that it will be updated with more things to try over the next 5 months. I have that second braid from the set that I can use. Can’t wait to see what else I can create!
You can see the Series Introduction for the class from Spin Off here: https://www.youtube.com/watch?v=Ykba-EG0Q0c

Leave a comment